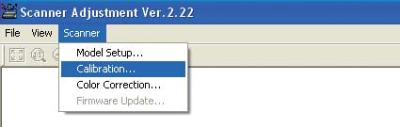
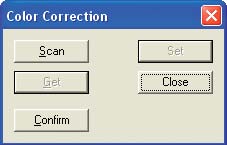
Calibrate the scanner before first time use or if scanning quality is observed to deteriorate e.g. The scanned image is distorted, areas of uneven color appear in the scanned image, other unsatisfactory results (but excluding problems related to media quality, such as folds, ceases or 
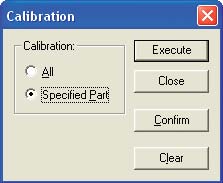
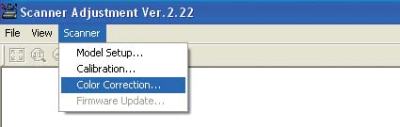
paper curl).

The scanner calibrations consist of a:

  • Basic Calibration
  • Color Calibration

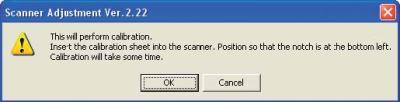
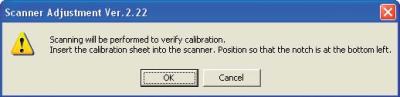
Before beginning calibration, clean the transparent contact plates located inside the scanner and the surface of the document scanning table. Any dust or dirt on these surfaces may affect the calibration results and the resulting image quality. Also check that the calibrations sheet is free of dust or dirt.

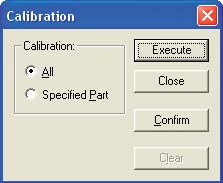
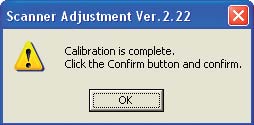
1. Basic Calibration

  1. Launch the Scanner Adjustment program and then display the Scanner menu.

    Select Calibration on the Scanner menu.
  2. Select All in Calibration and the click the [Execute] button.
  3. Insert the calibration sheet into the scanner as instructed.
  4. Click the [OK] button to begin calibration.
  5. Calibration ends after approximately 10 minutes.

    Click the [OK] button to complete calibration.
  6. To check the calibration results click the [Confirm] button in the Calibration screen (see step b)
  7. Insert the calibration sheet into the scanners once again as instructed.
  8. Click the [OK] button to start scanning.
    The scanned data is displayed when scanning is complete. Colors may differ slightly fro individual sensors to makeit easier to identify problem areas in calibration. (This does not indicate a defect).
    Check that there are no vertical streaks, such as white patches in the scanned data. (Streaks occur when calibration is not performed correctly due to contamination by dust or dirt.)
  9. If the data is normal the calibration is complete. Click the [Close] button and exit the Scanner Adjustment Program.
  10. If any abnormal data is observed specify the problem areas as follows.
    Select Calibration from the Scanner menu and then select Specified Part in the Calibration screen.
  11. The mouse arrow cursor changes to a cross cursor when moved over the data. Click the left mouse button with the mouse positioned over the streak data. The selected area is shown in blue. Repeat the procedure for any additional streaks.
    Areas that have been selected (shown in blue) can be deselected by clicking the left mouse button again. To deselect all selected areas click the [Clear] button.
  12. Once all the required areas have been specified , remove the calibration sheet and clean the transparent contact plate and document table surfaces. Check the calibration sheet for dust and dirt.
  13. Click the [Execute] button and then follow the instructions displayed on the screen. (same as step (c) to (e))
  14. Perform step (h) to (j) once more and verify the calibration results.

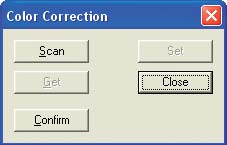
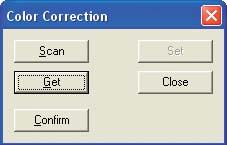
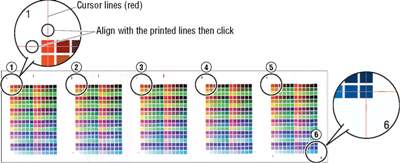
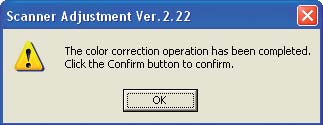
2. Color Calibration

  1. Display the Scanner menu.

    Select Color Correction
  2. Click the [Scan] button.
  3. Insert the color correction sheet into the scanner as instructed.
  4. Click the [OK] button to start scanning.
    The scanned data is displayed when scanning is completed. Colors may differ slightly for individual sensors but this does not indicate a defect.
  5. When the data is displayed click the [Get] button.
  6. Click in the center of the color tiles indicated by the numbers 1 to 6 on the color correction sheet in ascending order. For numbers 1 to 5 click the center of the upper left tile; for number 6 click in the center of the bottom right tile. Align the cursor crosshair with the printed reference lines beside each of the indicated tiles.
  7. Click the [Set] button to perform color correction.

     
  8. When color correction has been completed click the [OK] button.

     
  9. To check the color correction results, select Color Correction from the scanner menu and then click the [Confirm] button in the color correction screen.
  10. Insert the color correction sheet into the scanner as instructed.
  11. Click the [OK] button to start scanning.
    After scanning has been completed an enlarged view of the color corrected data is displayed.
  12. Click the Fit icon to display the entire image and check whether there is any discrepancy in color. If there is no discrepancy, color correction is completed. Click the [Close] button.