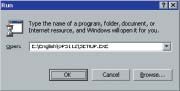
Installing Scanning Master21+ Software

  1. Start Windows
  2. Insert your scanner's User Guide CD-ROM into the CD-ROM drive slot.
  3. In the Start menu, select Run.
  4. In the Run dialog box type the CD-ROM drive letter followed by "English\OPS112\Setup.exe".
  5. Once you click the OK button the scanning Master21+ setup programs starts. Next follow the instruction of the setup program to perform the setup.
    NOTE: Once the setup program terminates normally "Scanning Master21+" is added to the Programs menu in the Start menu.

Setting up the Scanner in Scanning Master21+

  1. Make sure that the scanner is connected to the computer and the power to it is off. Then power on the scanner.
  2. Power on the computer
    Windows starts up
  3. Locate the Scanning Master21+ icon. To do so
    1. Click the Start button
    2. Select Programs
    3. Select the ScanningMaster21+ folder. The ScanningMaster21+ icon is found there
  4. Click the Scanning Master21+ icon
  5. If you are running the Scanning Master 21+ for the first time, use the Model Setup in the Scan menu to specify the scanner currently connected to the system.