
![]()
![]()
![]()
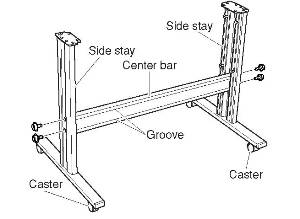
The Scanner stand contains:
- Two Caster Frame <<pictures of each component>
- Two Side Stay
- One Center Bar
- Twelve Regular Screws
- Four Coin Screws
- Assemble tool
- Document basket
- Support Wires
Assemble the stand before mounting the scanner unit.
Activate the video by moving the cursor over the video clip to the right.

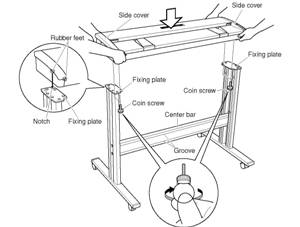
Secure the side stays in place by tightening up the four center bar fixing screws.
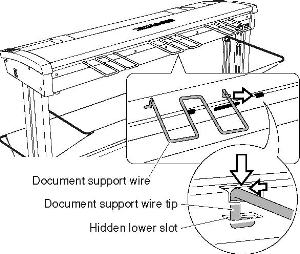
- Insert one end of the document support wire provided into the slot at the rear of the scanner. There is a second, hidden slot underneath the first slot. Make sure that the tip of the document support wires is also inserted firmly into the second slot.
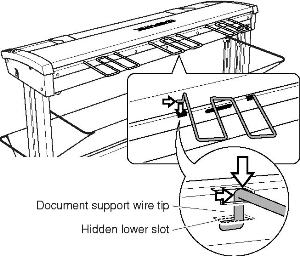
- Squeeze the document support wire and insert the other end. In the same way as step a above. Make sure that the tip of the document support wire is also inserted firmly into the second slot.
- Insert the middle section of the document support wire into the elongated slot in the scanner unit.
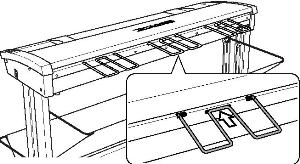
- Attached the other document support wires in the same manner.
(a)
(b)
(c)
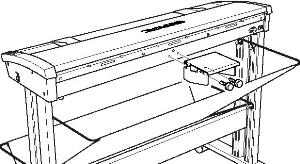
- Attach the thick document support unit provided using the two screws on the back side of the scanner's main unit.
- Adjust the thick document support unit angle using the
adjuster screw underneath.
(a)

(b)